Installing Redmi 6 and 6A firmware via SP Flash Tool
Tested on Redmi 6 and 6A
Requirements
1) Availability of a PC
2) Flash drives for at least 2Gb
3) Internet
Creating a bootable USB flash drive
1) Download Rufus
2) Downlod ISO
3) Use Rufus to write the image to a USB flash drive
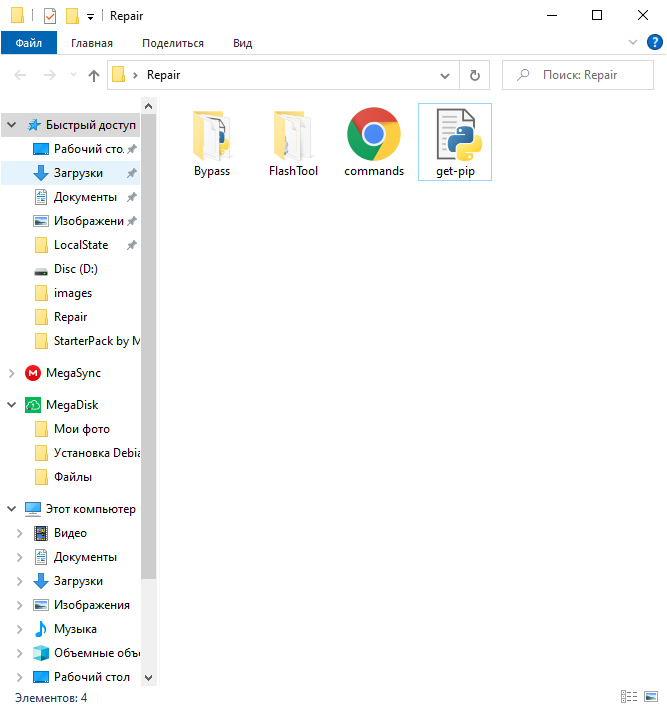
Preparing a folder for work
1) Create a folder C:\Files
2) Put these files in C:\Files
3) Unzip the fastboot rom and move the images folder from it to the folder C:\Files
4) As a result, you should get a folder, as in the screenshot
Booting from a USB flash drive
1) Connect the flash drive to the PC
2) Booting from a USB flash drive via BIOS/UEFI
3) Select the second item > Enter
Preparation and installation
1) Select the disk in which the Files folder is located
2) Opening it commands.html
3) Example of entering commands
4) In the folder, right-click and click on Open Terminal Here
5) And we execute each command
6) When you enter the first command after a while, you will be asked to choose Y or N. Press Y and Enter
7) After entering the command ./main.py -c mt6765_config.json -p mt6765_payload.bin connect a switched-off smartphone with the Vol+ button pressed to the PC
8) After entering the command ./flash_tool.sh starts SP Flash Tool
9) Click Options > Options > Connection and make the settings as in the screenshot
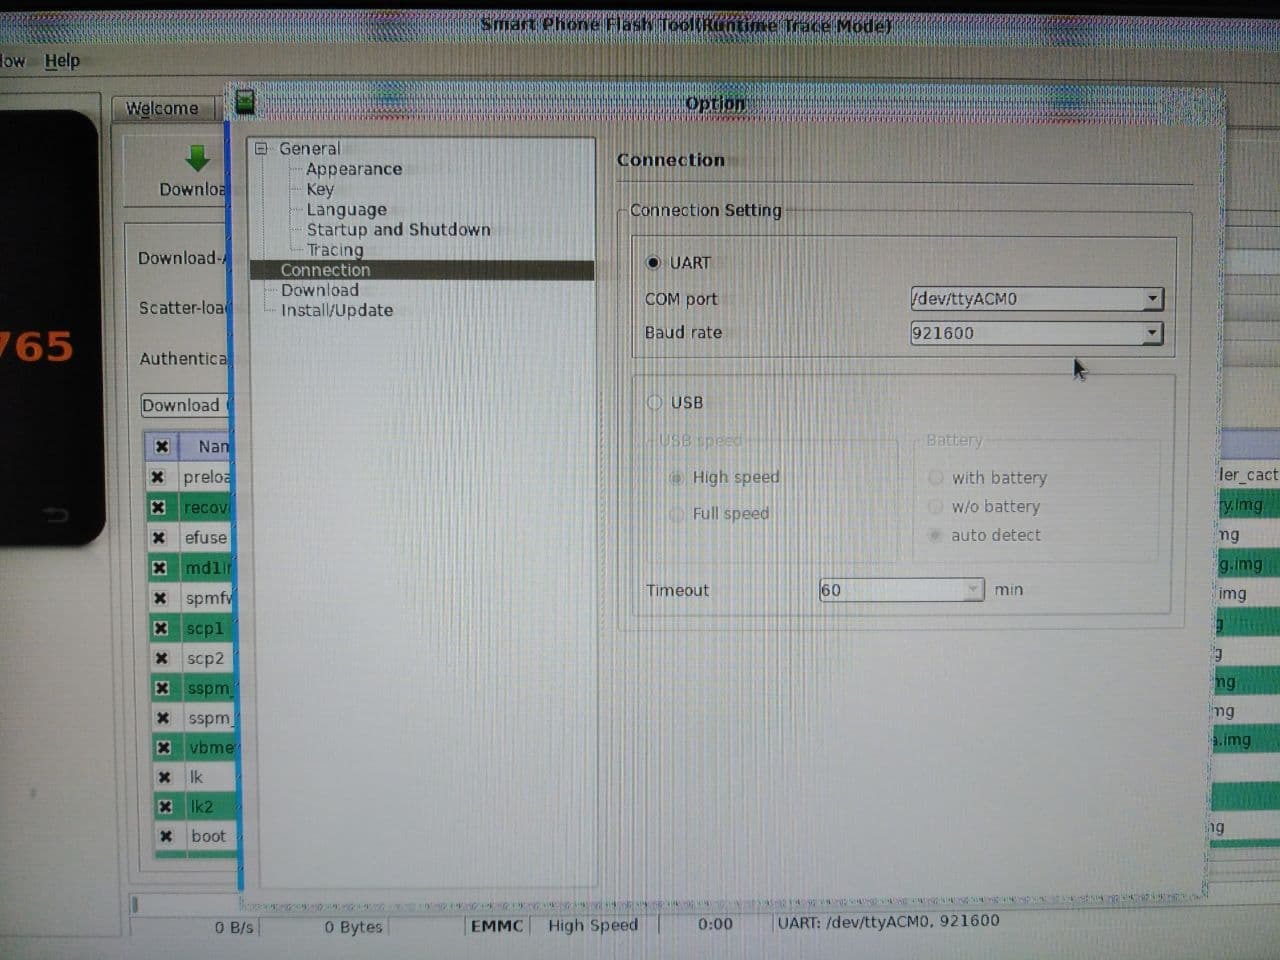
10) After selecting the Scatter file from the image folder in the line Scatter-loading File and click Download
11) The firmware installing process has started. After the green check mark appears, you can disable and start the smartphone
source 4PDA
Post a Comment for "Installing Redmi 6 and 6A firmware via SP Flash Tool"
Post a Comment